 Making more than enough food is more common than we like to think. Especially after a grill cookout. Not everyone comes as hungry as you would like them to be, and people just leave the extra food behind. In the case of burgers and minced/ground meat specialties, preserving leftovers goes as far as late night, the same day. But when it comes to ribs, you have the option to save these delicious treats for several days, or even for a long period of time.
In this article, we are going to talk about the possibility of preserving the leftover ribs, how to save them, and ultimately how to make them delicious again. There is more to it than just putting the slab in the fridge and throwing it on a grill 2 days later, so we encourage you to stay and read our detailed guide.
How To Store Leftover Ribs
To begging with, let’s talk about properly storing leftover rib racks. There are several rib storing ways out there, but we prefer the safest two: short term (fridge) and long term (freezer). So that’s exactly what you will need, a freezer or a fridge.
1. Short term rib storing
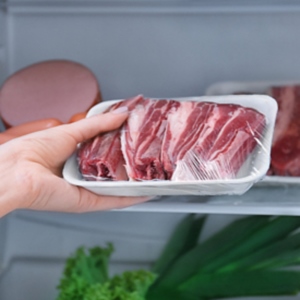
This is the way to go if you plan on reheating the ribs in the next few days. Refrigerators keep the temperature under 40 degrees Fahrenheit, and that is a good environment to keep the germs at bay. Now, after the ribs have cooled off, it would be best to put them in the fridge as soon as possible. DO not wait for the ribs to reach room temperature, because the longer they spend on the counter, the larger the chance of bacteria attack.
Now, what you want to do is take the rib racks and put them in some kind of container. This container can be made of metal or plastic, or you could even use a plastic bag. Whatever you choose, aim for a container that is airtight, because you do not want the moisture to escape, or too much air to get in general.
The ideal scenario would be to get a vacuum tight bag and suck all the air out of it. If you have any leftover gravy or sauce, feel free to leave it inside with the ribs, because for the next few days, this sauce will take on the role of a marinade.
The short-term rib storing is safe for up to 4 days max.
2. Long term rib storing
In the case that you do not intend to make another cookout any time soon and you have a bunch of untouched ribs laying around, you have the option of freezing the leftover ribs. This system of storing ribs lasts much longer than the fridge one, although it is not eternal as some people like to suggest.
Now, even though you can freeze the ribs inside a plastic or a metal box, this time we do not recommend it. If you decide to do it be prepared for special thawing because plastic box freezing tends to let the extra moisture in and it will turn into ice flakes in no time.
Vacuum-tight bags are the right tool for this job, so feel free to have at it. After you have drawn all the air out, all you have to do is rack the leftover ribs (pun intended) and leave them to freeze. The extra sauce rule applies here as well, so feel free to pour the leftover gravy inside, and leave it as an integral part of the ribs.
Rib Storing Tips
No matter which way you go, fridge or freezer, you should be aware of some basic stuff regarding rib storing. This is considered common knowledge in many professional kitchens around the world, so why not update your house rules.
1. Has the meat turned bad – How can you tell?
After you get the meat out of the fridge or freezer, what you want to do first is to check if it turned bad. This should not be hard, and the only tool you will need is your nose. Meat that turned bad tends to smell really, really bad, and there is no way you can miss it.
However, if you are not sure, there are other indicators you can use to double-check:
- The appearance of a thin slimy layer over the rib surface. If it is there, the ribs are not unsafe to eat per se, but you can kiss any type of flavor goodbye. The safest option is to throw it all away.
- Significant color changes. Yes, you can also determine the state of ribs by simply looking at them. If they turned pale, or way darker, it is time for the trash can.
- Combination of the above. Check for smell and color, and the slimy layer. It will almost always be two of those symptoms because spoiled meat changes fast.
2. Putting the ribs in the fridge/freezer – How soon?
 The main rule is: do not hesitate! We already mentioned once that you should not let the ribs rest on the counter, and we meant it. The real reason behind this is to avoid the danger zone of temperature, which is somewhere between 40 and 140 degrees Fahrenheit. In an environment, this hot, bacteria tend to multiply and get quite lively, so it would be best to act quickly.
This rule applies especially to people living in hotter areas, or if you are doing this during hot summer days. Temperatures of 90 or 100 degrees are the most dangerous when it comes to meat safety. So, after you have realized that people are not going to eat the whole batch of prepared rib racks, you should wait no longer than 2 hours to start with the packing.
Some refrigerators do not allow you to put hot stuff in right away. In this case, wait for 30 to 60 minutes for the rib racks to cool off a bit, and only then start packaging them and preparing them for freezing. The vast majority of fridges have their default temperature set to be below 40 degrees already, so any fridge will do the trick.
If you want the ribs to cool off faster, you can also cut them into smaller rack pieces before packing them for refrigeration. Doing this will not only ensure faster cooling, but it will also allow you to prepare them faster when the time comes.
3. What’s the amount of time you can keep the ribs in the fridge/freezer?
As we already mentioned, when it comes to freezing, there is no clear limit. Frozen food cannot get contaminated, and the bacteria in charge of dissolving it cannot attack the meat in any scenario. The ribs you decide to freeze will remain safe to eat for a long, long period of time, but there’s a catch.
Safe does not equal tasty, and that is why we would recommend you to keep the ribs frozen for no longer than two, maybe two and a half, months. If you plan to freeze them for this much, feel free to soak them in gravy before freezing. Use as much as you can, because frozen food tends to lose juiciness and moisture upon thawing, and let’s be real here, no one likes chewy and dry rib meat.
In the case of just keeping the ribs for a few days only, you will use a fridge that can keep your food below the danger heat zone (below 40 degrees Fahrenheit). And that is all to it, you get to keep the ribs cool for up to 5 days before reheating them and serving them again. Some people suggest that this period should be as long as a week, but we would disagree. When they lay in the fridge for longer than 5 days, ribs get soggy and flavorless, so keep them to 5 days max!
How to Reheat Ribs and Keep Them Juicy and Flavorful?
Now that we went through the important prerequisites regarding meat storage, it is time to get to the most important part, the reheating process of ribs. We need to talk about temperature, the appliance you intend and can use, the post-processing, and of course, type of ribs you are reheating. These are all important factors in our juicy equation.
There are three main rib types that people around the world love to eat: beef ribs, baby back pork ribs, and spare pork ribs. And, you’ve guessed it, we need to treat them differently when it comes to reheating. So, let’s jump into it!
1. Reheating Beef Ribs
Beef meat is known for its lower fat percentage compared to pork, and that plays out to our advantage. The lower the fat level, the tastier the reheated ribs. So, if you happen to have some cold extra beef ribs around here’s what you need to do:
- Preheat your grill to about 250 degrees Fahrenheit. It would be ideal to reheat them on a charcoal grill for the extra flavor, but any small charcoal grill will do.
- Use wrapping aluminum foil and wrap the beef ribs tightly with a double layer. You do not want that moisture to escape.
- Take the wrapped ribs and put them on indirect heat.
- Use the thermometer to check on the rib’s internal temperature. Once it reaches 165 F, you are good to go.
Now, in the case that you do not have access to a grill, due to weather or other circumstances, a standard kitchen oven will ah veto do. Here’s how:
- Preheat the oven to 250 degrees. Do it gradually and not by raising to high heat and cooling.
- Use aluminum foil and wrap the ribs while leaving some space between the foil and the meat.
- Place the ribs inside and spill a ¼ cup of liquid as evenly as you can on the foil. This will add additional moisture and make the ribs juicier after reheating. As a liquid, you can use beer, water, or sweet fruit juices, with apple being the most common one.
- Once you have it prepared, put the foil with the liquid and ribs inside the oven and wait for the inner temperature to reach 165 degrees, using a thermometer. You can check our wireless meat thermometer reviews to gain proper knowledge.
- After the meat is reheated, let it rest for up to 10 minutes. This period is important for all the evaporated juices to be soaked into the meat.
- Take the meat out of the foil and serve.
2. Reheating Spare Pork Ribs
Spare ribs coming from a pig are larger and fatty. This makes them a bit harder to prepare in the first place, but people that like them say that every moment of extra trouble is worth it. When it comes to reheating them and storing them in general, it is important to remember that the high-fat content contributes to the spoiling of the meat faster.
However, you will never have to apply an extra layer of moisture like water or any type of liquid, because spare pork ribs do not dry as easy as the other types. So, here are the steps to follow to get to that juiciness again:
- Preheat the oven to 250 degrees max, or the grill to about the same temperature
- Take the ribs out of the container and wrap them in aluminum foil
- If you insist on a richer flavor, you can add some extra sauce, just remember to not go overboard with it. Spare ribs are already fat and juicy, and if you put too much sauce, you will end up with a soggy rib rack.
- Wrap everything in the foil and put them on the grill or in the oven
- Measure the temperature with a meat thermometer, and wait for the insides to reach 170-175 degrees Fahrenheit. The higher temperature is due to all the extra fat content.
- Take the ribs out and serve.
3. Reheating baby Back Pork Ribs
As opposed to spare, baby back ribs have a lower percentage of fat, and that means that they tend to dry out more easily. This also means that you will need more sauce or gravy to make up for all the dried-out parts. The ideal tool you could use for reheating baby back ribs would be a broiling pan. And this is how:
- Take the baby back ribs and place them on a broiling pan with the bones sticking up
- If you so wish, apply more sauce at this point using a brush or just by spraying it around
- Set the sauced baby back ribs in a position 4 inches below the broiling element.
- Leave the ribs to warm up under the broiler for about 4 minutes. If the sauce starts boiling, that’s the cue to remove them
- Take the broiling pan off the heat and turn the ribs on the other side. Cover them with some aluminum foil and return them for another 4 minutes
- Remove the pan and slightly uncover the ribs. Let them rest like that for 5 minutes max
- Unwrap the ribs completely and serve.
This way of reheating is slightly faster than the standard oven/grill procedure. If you have the time to do it, however, you can always reheat them by following the same steps as mentioned n the spare ribs section. However, you need to be strict with temperatures and timing, because baby back ribs are eager to turn dry in the blink of an eye.
One pro tip: if you want the baby back ribs to taste similar to what they did when you first grilled them, you can take them off the heat several times and apply BBQ sauce. Be very generous if you want o avoid dryness.
Other Rib Reheating Methods
As you can see, the most popular systems among grill masters are none other than an oven and a grill. But those are not the only methods out there. We would like to talk to you about two opposite sides of reheating methods: microwaving and water bath method (aka sous vide). We understand that there is a lot of speculation out there, and it is time to put rumors to rest.
1. Microwaving as a Form of Rib Reheating
 It is possible, but…
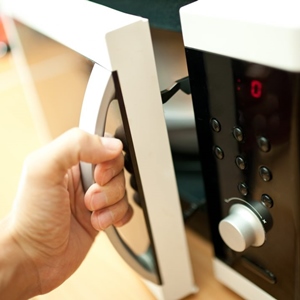
To understand why we are not fans of microwaving as a form of rib reheating, we must remind you of how these ovens actually work, and the answer will reveal itself, hopefully.
So, microwaves are ovens that use focused radio waves and point them to water molecules inside the food you want to heat up. These molecules get pretty hot pretty fast and eventually evaporate. While they get hot, they heat everything around them, and in this case, it is the rib meat.
But, do you see the issue here? Evaporating extra water from already dry food will make the ribs taste like sand. It will turn the meat into a chewy mesh that only slightly resembles grilled ribs. We strongly advise against the microwave reheating method, for flavor and structure sake!
However, we do encourage you to take a small rib and test it out yourself. The best proof is the proof of truth!
2. The Crown Jewel of Equal Heating – Sous Vide!
We saved the best for last! The water bath method of heating food is mostly known to professional chefs and gourmet cooks, and if it’s good for them it is good for everyone. So, without tickling your imagination anymore, here’s how it works.
Sous vide is basically bathing the meat in steaming hot water. For this to be successful you need a large bath, or in our case a large pot, to hold all the water. Water cannot go over the boiling point (212F) when it comes to heat, so the risk of burning the rib to a crisp is practically non-existent. Just remember that for this technique you need to put the ribs into completely sealed plastic bags designed to withstand this kind of temperature. And here are the steps:
- Take a large pot, fill it with water, and put it on a stove. Heat the water in the pot to about 155-160 degrees Fahrenheit
- When the water reaches this temperature, put the sealed bags with the ribs directly into the pot. If you so wish, pour some sauce in the bag before you seal it, for extra flavor.
- Keep the meat bags inside this water bath for as long as you like. Usually, 1-3 hours will do the trick, but do not go less than an hour.
- Get the bags out of the water, dry them out and serve.
The magic of this method is in safety. You cannot burn the meat; however, you will not be able to make another crusty layer, which is possible using traditional methods. But hey, not a single drop of sauce or moisture will leave the rib texture, which is great considering that this is the second time you are heating up this particular rack of ribs.
What’s best about his method are other possibilities. All sorts of food can be heated up like this, with minimal risk and maximum heat spread.
One Final Thought!
There is no shame in reusing leftovers, especially when those leftovers are tasty, tasty ribs. You’ve probably spent hours preparing them in the first place, and if you get the hang of a reheating technique, you can have flavorful rib meat anytime you want.
So, to summarize:
- Don’t let the meat sit on room temperature before refrigerating. Bacteria love room temperature, and you can waste a perfect rack of ribs like this. 2 hours tops!
- If you opt for a fridge, the ribs are good for 5 days max. With freezing them, you can get as much as 3 months.
- Reheat the ribs to a safe temperature of 155+ degrees Fahrenheit, and do not rush with the heat, or else you will evaporate the moisture out of the ribs.
- Reapply the sauce if needed
And finally, the most important things above all: enjoy the results of your grilling skills!