So, you have gotten your hands on a nice griddle and want to give it a test run? Most people would agree that there’s no better way to do it than making some breakfast food, and by that, we mean hard-hitting breakfast food: bacon. There are many ways to get around bacon and prepare it, but we are going to focus on one of the tastiest, and easiest, out there, and that is using a griddle. Let’s go right into it!
Things You’ll Need
Preparation is the key to success, no matter what you do, and cooking is no exception. Some of you more experienced cooks out there might find this list redundant, but we insist that everything should be accounted for, and listed properly. Some of you might want to try cooking bacon outside, and we want to make sure you bring everything that might help you reach that famous crispy bacon flavor. We will mark the absolutely necessary things with an asterisk (*) sign.
1. Hardware:
- A unit from our outdoor griddle reviews or an electric griddle*
- Averagely sized tongs. In the case you do not have one, a larger fork will have to do*
- A wooden or silicone spatula
- A couple of plates: one for fresh and one for cooked bacon*
- A small bottle of water. A squirt bottle would be ideal
- Paper towels*
- Any kind of timer you can get your hands on, from simple egg-timers to phone stopwatches
2. Ingredients:
- Bacon strips*
- Some butter (half a stick will be just enough).
- Seasoning of your choice. We recommend simple spices like salt, pepper and maybe some paprika
Before you start
On our culinary journey, we have stumbled upon a little secret when it comes to cooking on cast iron surfaces. We are certain that you are aware of the whole seasoning process that even the top-rated cast iron griddles require every now and then, and we will pass this knowledge onto you, so you can make your food even tastier.
Seasoning is usually done with vegetable oil or lard, depending on your personal preferences. Before you start cooking, we recommend that you heat up your cast iron griddle and season it with a wide piece of bacon, preferably one that contains more fat.
Simply heat up your griddle to just under 400 degrees, and let it rest like that for a minute in order for the temperature to stabilize. If you want to make sure that your griddle is ready, use the squirt bottle and sprinkle some water on the griddle surface and if it evaporates quickly, its good to go. Now, take that piece of bacon you’ve set aside, and season the griddle by rubbing it against the hot surface. Wait for the extra fat to drip in the designated area, and lower the temperature a bit. You need your cooking temperature to be somewhere between 325 and 375 degrees Fahrenheit. You can consider having one of the best BBQ temperature controllers for this.
Cooking the Bacon
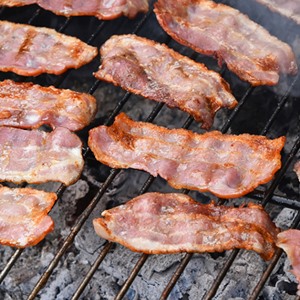 Once your griddle is ready, it is time to start cooking. Cooking on a griddle is different than cooking on a pan or on a grill because it gives you the freedom to maneuver without the fear of spilling or without bacon falling between the grates right into the fire.
Prepare your fresh bacon plate, and set everything close to you, because you won’t have much time to mingle around. Bacon cooks fast!
Step 1
Use the tongs (or a fork) to place the bacon strips side-by-side on the griddle cooking surface. Do not put a strip over another because that will make it cook unevenly, or possibly even overcook. If needed, you can also cut the strips in half.
Step 2
Now that the bacon is starting to cook, put the timer on 5-7 minutes, with a lower timer for higher temperatures, and vice-versa. The bacon will start to shrink and a golden-brown color will start to appear on the edges of each strip. If this doesn’t happen on some pieces, it means that they’re too close, so just split them apart a bit further.
Step 3
Use the tongs to turn over the bacon strips. While turning them onto their uncooked side, make sure to maintain the space between. Now it will probably be the time to use the spatula to push the excess grease into the grease disposal tray, through a hole. Burnt grease only increases the risk of spoiling the taste, so be thorough. Use the timer and set it to the same interval as before, depending on the temperature, of course.
Step 4
If you planned to make other food with your bacon, like pancakes or eggs, now would be the time to do it. The second side of the bacon should start to gain on that golden color, and it will leave enough space on the griddle due to the shrinking. Also, it would be a good time to season the bacon, if you so wish. Sprinkle some simple spices on top of each strip, but make sure to not overdo it, because bacon has its own unique flavor that we don’t want to ruin.
Step 5
The bacon should be about done when both sides start to look alike, by shape and color. Do not let any piece of bacon turn black or charred, and if that happens, quickly remove it.
Place some paper towels on the clean plate, and put the cooked bacon on top of them. They will soak up all the excess fat that might have stayed attached. Do not season the bacon after it is done.
On a Final Note
Cooked bacon is by far the highest-voted breakfast choice in the US and many other parts of the world. If you are also a fan, and you happen to have a functioning griddle, it would be a shame to miss this kind of opportunity and enjoy those golden delicious bacon strips. Some cooks even suggest that bacon cooked this way is healthier, due to fat removal, which is not possible if you do it inside a skillet, or other bacon cooking methods.
Mastering a griddle just needs a healthy appetite and some practice, so start cooking with GrillnSkill!